I have actually followed through and done some of the things I pinned on Pinterest. However, at the time I did most of them, I did not have blogging in mind
and
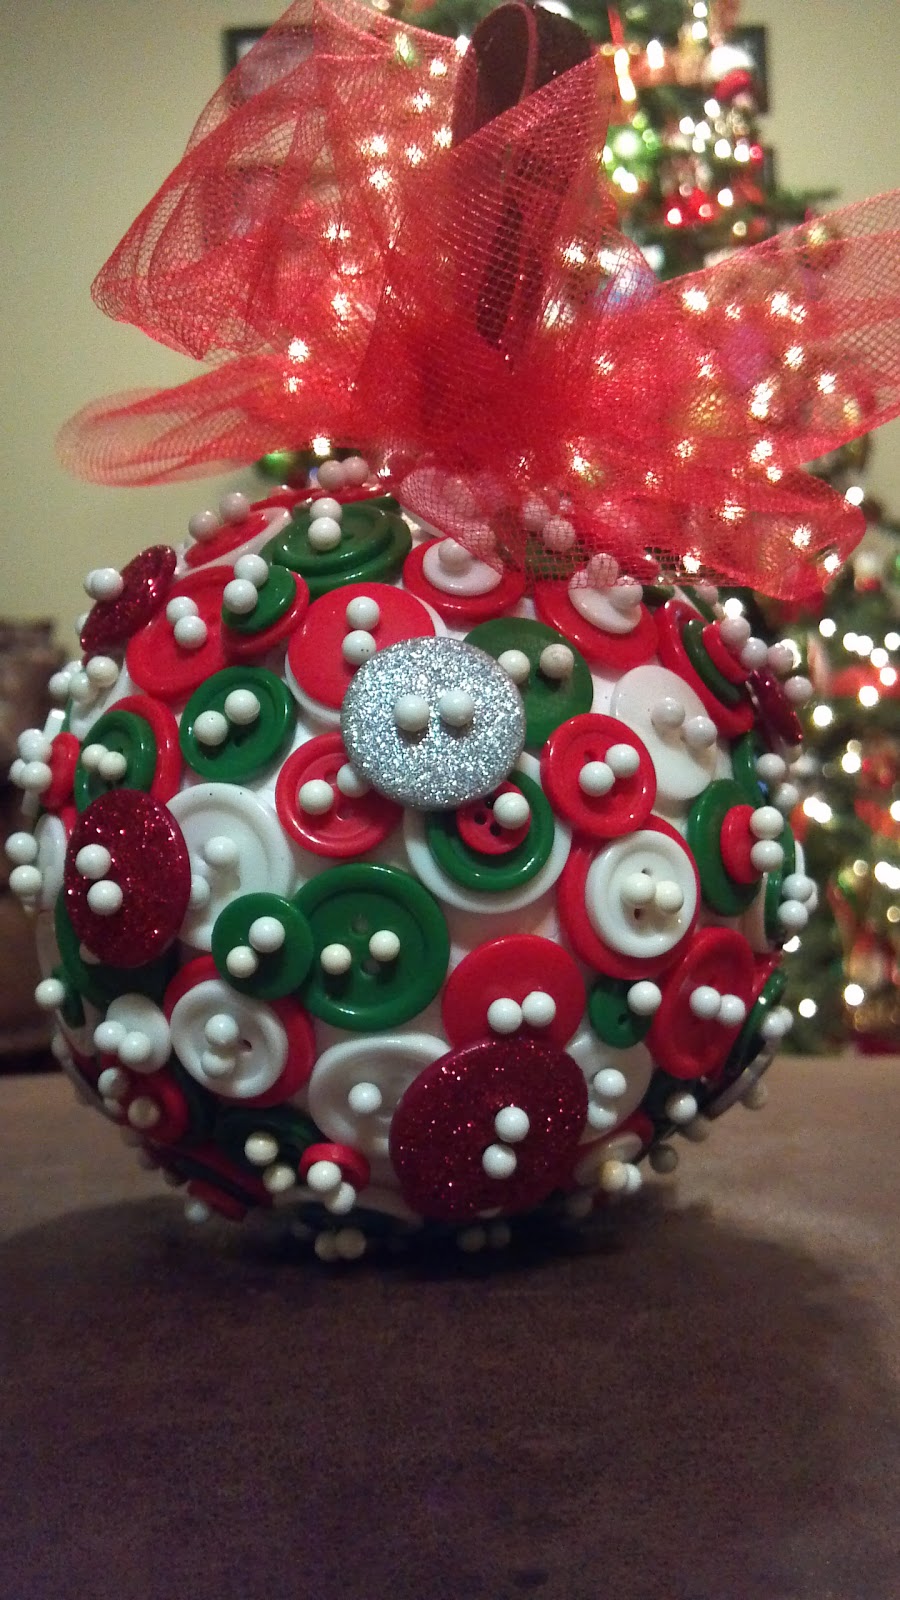
This first one is a Button Christmas ornament. I used a styrofoam ball, buttons, straight pins with the little balls on the ends, and some ribbon and tulle. It was pretty simple, but my fingers sure got sore fast pushing in all those pins. I pinned some ribbon in a loop and made a tulle bow and then just pinned some buttons around the top to cover the ends. This was a gift for a friend who loves to sew.
This is a 'drink' coozie that I knit for a friend. I think it really classes up the 'drink', don't you? I made it for her as a joke at first, but I really think I need one for myself now. (I just realized this was not a 'PIN', but I like it, so it stays!)

Next up is a headband holder I made out of an empty oatmeal can and some scrap fabric and ribbon that I had on hand. I just cut the fabric a little bigger than the lid, folded the edges to the underside of the lid, then hotglued it in place. Then I glued ribbon around the outer edge of the lid. For the can, again I cut the fabric a little longer than the can so I could fold the edges and glued in place. I like the pin I found for this where they glued the finished holder onto a painted wooden pedestal-type candle stick. I just haven't found the right one yet.


Here is the valentine we made for the sweet daughter's (my oldest) classmates this year. It was second grade and she actually braided all the bracelets herself. I say she is the sweet daughter because the little one is a hot mess. I call her punky-pie.

These are valentine bouquets I made for the girl's teachers. We used foam hearts that were self-adhesive and stuck them to pixie sticks. Then put them in mason jars filled with conversation hearts.

I love this magnetic make-up board I made. I mod-podged scrapbook paper onto a sheet of metal that my awesome hubby had cut to size for the frame I bought at the Salvation Army store. (I painted the frame with good ol' spray paint.) I super-glued (with E-6000 glue) magnets to my make-up. Tip: for heavier items, take off any labels that are on back of make-up before gluing on magnets. They come off pretty easy for re-use. I think hot-glue would work as well.

For these customized hand sanitizers (also teacher gifts), I used my Cricut machine to cut out names and designs with self-adhesive vinyl and added some rhinestones (self-adhesive of course) and a bow in coordinating ribbon. I didn't have a choice on the color palette for this project because all I could find for the sanitizer was Germ-X brand and they are turquoise. That kinda sealed the deal on the turquoise and brown combo. On the pin I found, they used smaller bottles that had white tops and used all different colors for letters and some polka dots, Very cute!

This was a project that the kids and I did at Christmas. We used cheerios to make elf donuts for our elf-on-the-shelf, Charlie. There were chocolate with sprinkles (dipped the cheerios in melted chocolate chips then sprinkles), powdered (confectioners sugar) and cinnamon. For the powdered and cinnamon donuts, I gave the cheerios a little squirt of spray butter to make it stick before rolling in the sugar and cinnamon. Then I put them in jewelry gift box that I wrapped and, of course, sat them out Christmas Eve along with Santa's cookies! (Charlie loved them!)

The original idea for this used coffee beans instead of pebbles, but I wanted to be able to clean these if they became dirty. Plus, I got them for $1.94 at Hobby Lobby (originally $2.99, but I used the 40% coupon). Much cheaper than coffee beans. They came in a 3 pound sack. Sounds like a lot, but it wasn't that much. I did have quite a bit left over though.

Feel free to copy any of these ideas and put your own twist on them! Just be sure and tell me about it or send me pictures!! Happy crafting!

Love the coozie :)
ReplyDeleteThanks!!
ReplyDelete